


While most people are quite adept in varying methods of propagating house plants from seeds, stems or leaf cuttings, few are familiar with the idea of air layering.
The Concept of Air Layering
Essentially, air layering allows growers to root the branches of plants that are difficult to propagate through cuttings - in particular woody plants like Ficus benjamina (Weeping Fig), Ficus lyrata (Fiddle Leaf Fig) and Ficus binnendijkii (Long Leaf Fig); Dracaena fragrans (Corn Plant), Ficus elastica (India Rubber Tree) and Yucca elephantipes (Yucca, Elephant Yucca), as well as Schefflera arboricola (Umbrella Tree) and many others - while they are still attached to their parent plant.
 This method is also useful if the goal is to have a new plant that is larger than a plant a stem or leaf cutting could provide in the same amount of time.
Required Materials and Tools
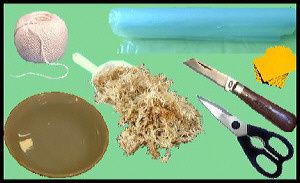
The following materials and tools are necessary to begin air layering plants to be propagated:
- Sphagnum moss (available from most garden centres/ nurseries)
- Bowl of water
- Sharp knife
- Piece of hard, thin plastic (a little longer than the diameter of the branch to be rooted; a piece cut out of a yoghurt pot, plastic bottle or plant tag will do)
- Transparent plastic foil/ bag, approximately 30 x 30 cm (12 x 12 in) in size
- String
- Scissors
The Technique
 The first step is to soak enough of the sphagnum moss to create a fist-size ball when pressed lightly (after squeezing out excess water) in the bowl of water. While the moss is soaking, the plastic foil or bag can be cut to size, followed by cutting two pieces of the string long enough to wrap a few times around the branch and tie with ease - around 20 to 25 cm (8 to 10 in) should be sufficient - and cutting the piece/s of plastic to size.
 After selecting the branch to be rooted, an upward slanting cut (approximately 45 degrees) needs to be made (using the sharp knife) just below a leaf-node (the spot where a leaf was/ is attached to the branch). As around 10 to 20 cm (4 to 8 in) of leaf-free branch is required, it may be necessary to remove some leaves.
The cut should go between half and two-thirds of the way through the branch. It is vital to ensure the cut is not too deep, as the branch may break if cut too far. Next, the small plastic piece is inserted into the cut. Doing this will prevent the cut from healing shut and encourage the branch to develop roots instead.
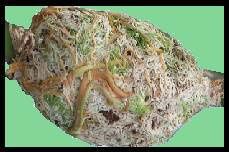
 The soaked moss is now wrapped around the cut and the area around it, taking care not to wrap it too tightly. When finished, the moss should feel soft and sponge-like. Holding the moss-ball in place, the clear plastic now needs to be wrapped tightly around the moss (it may help to get some assistance at this point) and secured above and below the moss with the prepared string. It may also be a good idea to support the branch by tying it to a stake/ cane just above the moss-ball to stop it from snapping.
Depending on the species of plant, roots should begin to develop and grow into the moss over the next few weeks/ months. The clear plastic covering will make it easy to check on progress without having to disturb the process by unwrapping the moss-ball. If no roots show within the expected time period, it may become necessary to carefully open one end of the plastic and check whether the moss-ball is still moist enough.
 Once the roots are well developed, the branch can be cut off below the wrapped moss-ball, and after removing the plastic foil - taking care not to disturb the roots/ moss too much - the new plant can be potted up in a suitable quality potting mix. The pot/ container should not be much bigger than the root ball, as the soil in a larger pot will hold too much water for the young plant's roots to cope with, causing them to rot.
For the same reason, watering should also be done with care, especially for the first three or four weeks. While the soil should be kept slightly moist to prevent wilting, it should never be allowed to be really wet or soggy.


 Asplenium nidus, the Bird Nest Fern
  Cleaning the leaves of house plants may seem to be a strange task, but removing dust from the leaves will not only ensure the plant gets adequate light exposure, it will also help to get rid of tiny insects.
  Pinching, or removing the young tips of stems by using the forefinger and thumb, will help a plant to become fuller and bushier. Especially effective on soft-stemmed plants, such as the coleus, for instance, pinching just above the growing point where leaves are attached (the node) will force branching below the pinch or cut. This prevents plants from becoming too 'leggy'.
  House plants with woody, thick stems need to be pruned using pruning shears. Preferably done when the plant is in an active growing period, any dead branches or stems need to be pruned off to prevent decay, which may cause fungus attacks. Yellow or brown leaves, which will attract insects and diseases, should also be removed.
 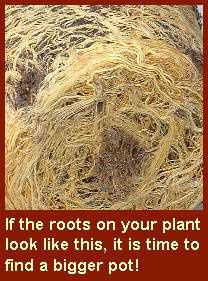 It is usually possible to notice that a plant is ready for a bigger pot when roots start appearing on top of the soil, or when they start growing out of the drainage hole at the bottom. If a plant's growth seems to slow down or stop altogether, easing the plant out of its container to inspect the roots will determine whether repotting is needed or not.
 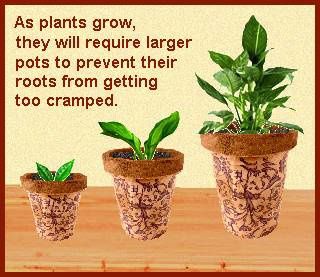 The new pot should be no more than 2 in deeper and 2 in wider than the current pot, because if a pot that is too large is chosen, the top of the plant will not grow until the roots have filled the excess space in the pot. In addition, a pot that is too large will hold too much water, which could potentially cause the roots to rot.
 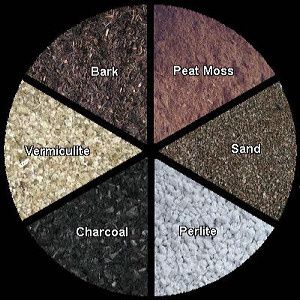 Potting mixes not only provide a house plant with the support it requires to stop it from falling over, they also store and provide the nutrients and water required by the roots. At the same time, potting mixes ensure plants do not get water-logged by providing good drainage, as well as allowing sufficient air to circulate within the potting medium to allow vital oxygen to get to the roots.
 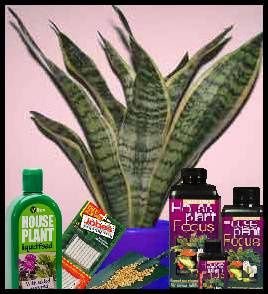 The most common and easy to use fertilisers for house plants are water soluble and come in the shape of crystals or granules, liquid, powder or sticks. Slow release granules are simply sprinkled onto the soil and will gradually dissolve as the plant is watered.
 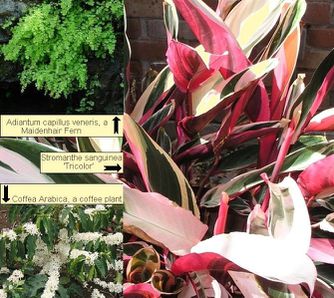 Other indoor house plants with high humidity requirements are, to name but a few, coffee plants, such as the Coffea arabica or Coffea canphora, which is more commonly known as the Robusta; Stromanthes, such as the Stromanthe sanguinea 'Tricolor; various Heliconias, including Heliconia rostrata and Ginger plants, Zingiber officinale. Musa banana plants such as the Musa basjoo, Musa cavendishii and Musa zebrina, also prefer relatively high humidity.
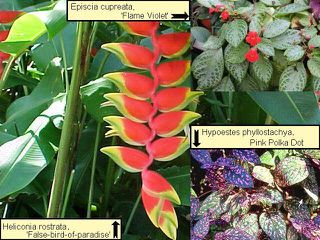 Plants also create their own humidity by emitting moisture. Placing indoor house plants together in groups will assist them in generating some of the humidity they need for each other. This will help, but it may still be necessary to employ one of the above methods to help them along, especially if there is a fireplace blazing away in the room as well.
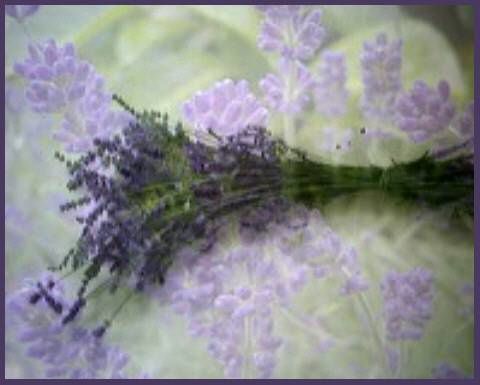 Lavender, Stings and Bites
 The pulverised dried flower heads combined with pulverised dried holly-leaves make a wonderfully fragrant incense to help a person to get some sleep. To make the incense cones, it is necessary to dissolve 1 part of gum arabic in 2 parts of water and leave it to soak for about 3 hours.
  She then dropped the flowers, about about 12 flower heads worth for every six pints of water, into boiling water and left them there just long enough to let them go almost white. After straining the fluid, she added 1 lb (about 450 g) of sugar per pint (about 1/2 litre) of fluid, a dash of lemon juice and a little extra pectin ( it works without, but will set much better with it!) and boiled it to setting point.
 Obviously, water requirements will vary depending on the species of plant and the natural habitat it derives from. A cactus, for instance, will never require as much water as a leafy plant originating from a rain forest. The soil in which indoor house plants are potted, the amount and intensity of light they are exposed to and the humidity and temperature in the room will equally affect their need for watering.
 The plant's growth cycle will also have an impact. During cycles of growth, the plant will absorb greater quantities of water than during rest or dormant periods. The type of pot it lives in also affects how much water needs to be provided. A pot that is too large may retain too much water, while a tiny pot may dry out too quickly for the plant's needs. Indoor house plants in plastic or glazed containers will require watering less frequently than those in porous clay pots, because much of the moisture will be lost through the pot's pores.
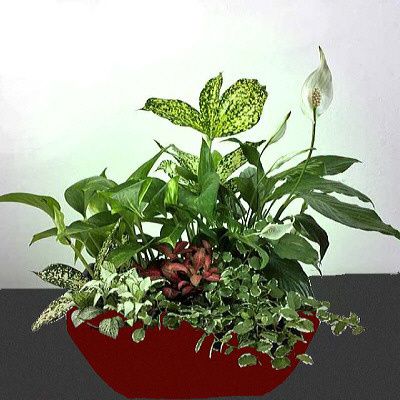 Placing a selection of different indoor house plants into a single large container can achieve a very attractive look. Naturally, it is best to choose plants with similar requirements for such an attractive indoor garden. Combining plants that will require lots of watering with others that rarely want a lot of water, can and will lead to disaster, at least for some of the species used.